


Employees
Creation:
To create a new employee, we will click on the green button that says “Create”, and we will move to this tab:
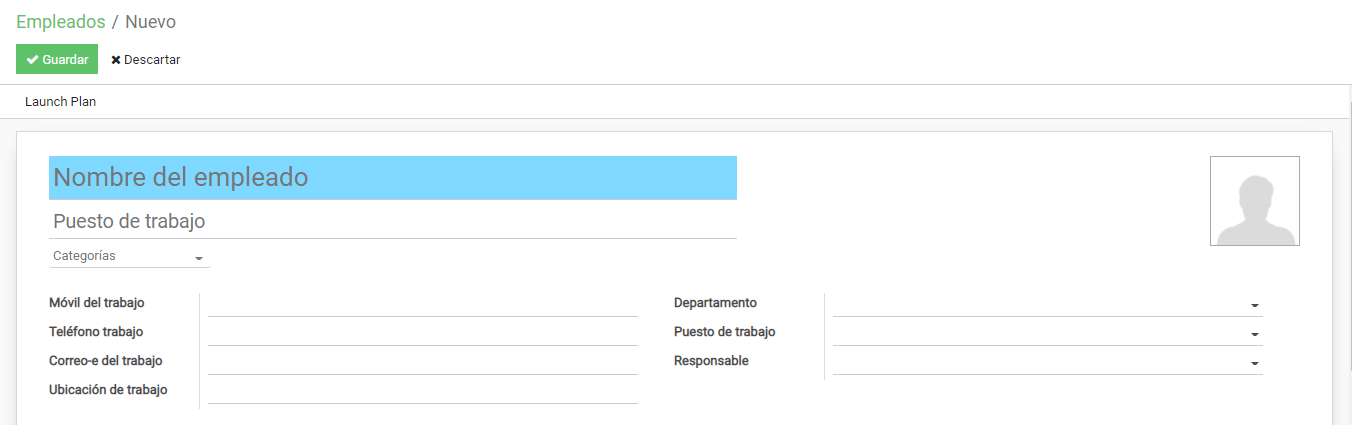
In this tab we can establish various data of each new Employee that we create , but those that we care about are those that give a structure to the system:
We must specify:
Creation:
To create a new employee, we will click on the green button that says “Create”, and we will move to this tab:
In this tab we can establish various data of each new Employee that we create , but those that we care about are those that give a structure to the system:
We must specify:
- A Name with which to identify the user
- A department to assign it to (previously created)
- Your job title (previously created)
- Your Responsible (it is set automatically if we have configured it in Department)
Once these fields have been configured, the rest of the information is put to the User’s taste. Once the user configuration is done, we will save the settings and we will be able to operate with that user.
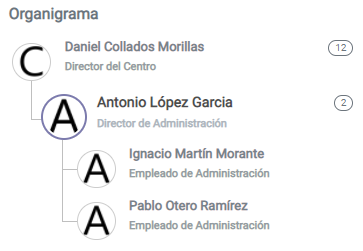
Also, the program has an organization chart which is shown in the configuration of each user and lets us see if said user has a boss or subordinate:
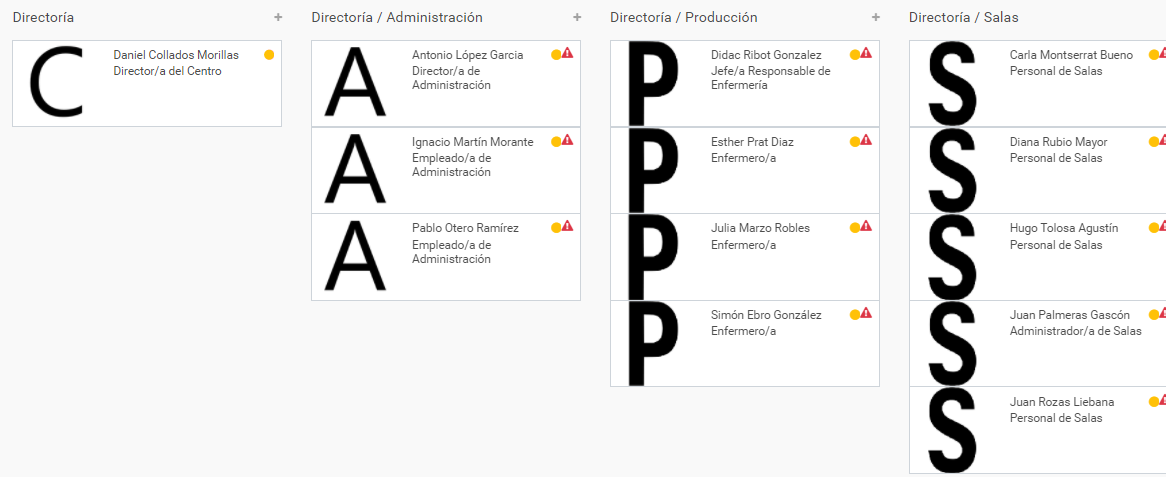
Employees Directory:
We have an Employees directory where we can see in an orderly manner a list of registered users and in which departments and what positions they have.
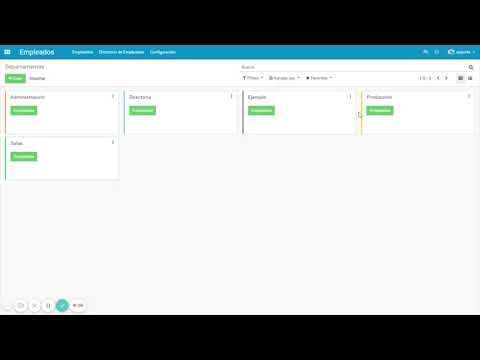
Creation of Departments:
To create departments, you must specify the name of the department, the user responsible for said department (can be left empty) and if it has a parent department:

There is also a directory of Departments where we can see all the departments that we have created so far and perform various actions with them, such as viewing them in an orderly manner:

Next we are going to create an example department:
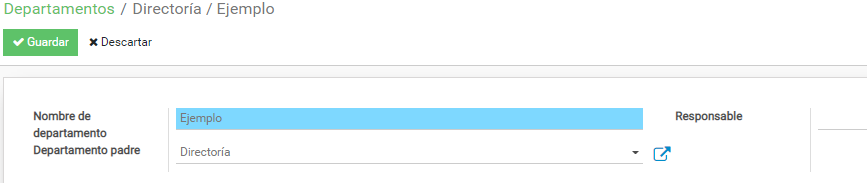
At the moment we do not specify the person in charge because we have not created that user.
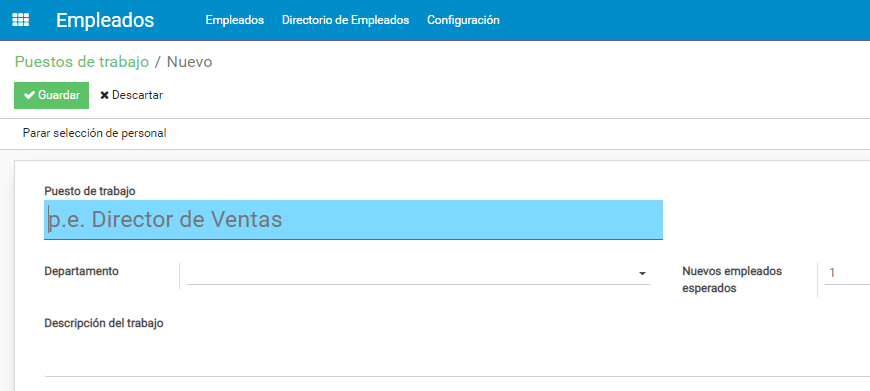
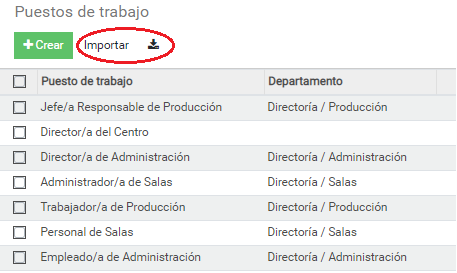
Creation of Jobs:
Jobs function as labels that we put on users to specify what role they have in the program:

The fields that we can see here are: the name of the job, the department to which it belongs, the current number of employees who have that position, the number of employees being sought for that position, the total number of employees desired for that position and the status of the job (hiring or not hiring):
The current number of employees will be updated when assigning the job to an employee.
To set the status of the Job, it is done by clicking on the text below the “Save” button, where it says ” Stop personnel selection “.
The current configuration of workstations can be exported to an excel format and imported into the program using the same excel document. To export it, it will be done from the Jobs directory:
Video example:
Here we leave a video where we create a department, a job and several users to put into practice what was explained:
Creation of Contracts:
Contracts are a field that must be assigned to each user, or the program will show us an alert in the users, in this way:
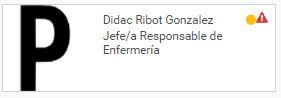
To remove this alert and that the program is in order, we must create a contract for the user who has that alert or modify the existing one:


